
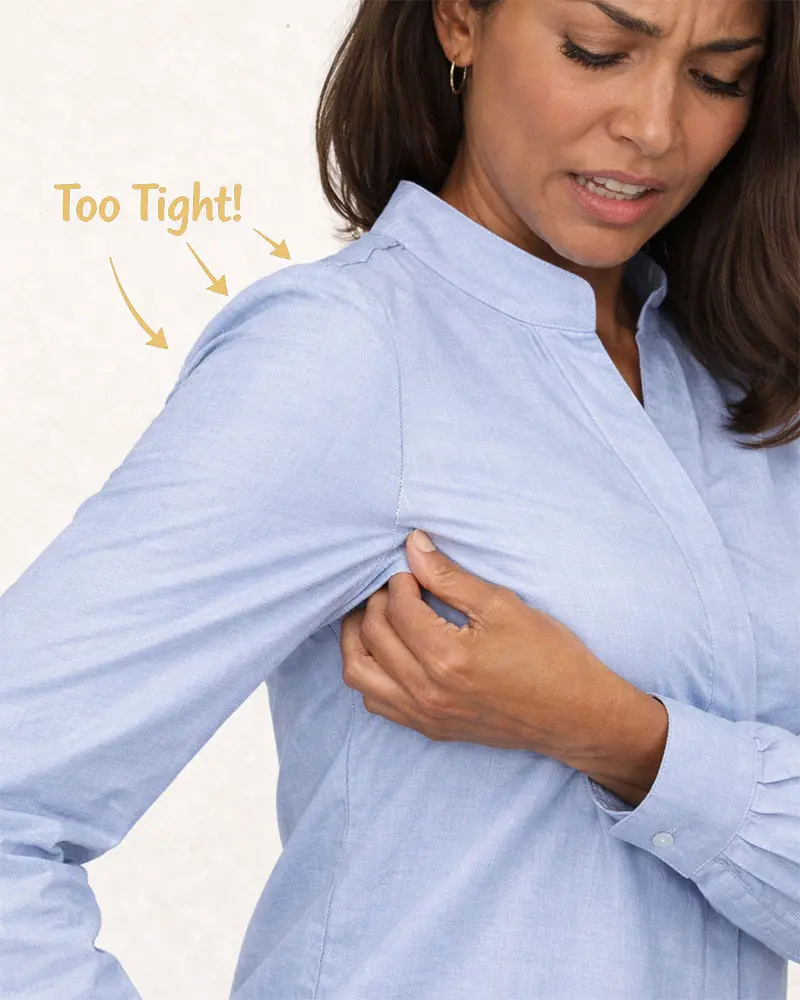
If you’ve ever wrestled with a set-in sleeve that puckers, pulls, or feels too tight under the arm, this guide is for you. In this post I walk through a practical, low-risk method for a successful sleeve and armhole adjustment using the Mukmena pattern as an example. The technique works for paper patterns and digital pieces alike — and it keeps your grainline intact, your sleeve cap shaped correctly, and your seams easy to sew.
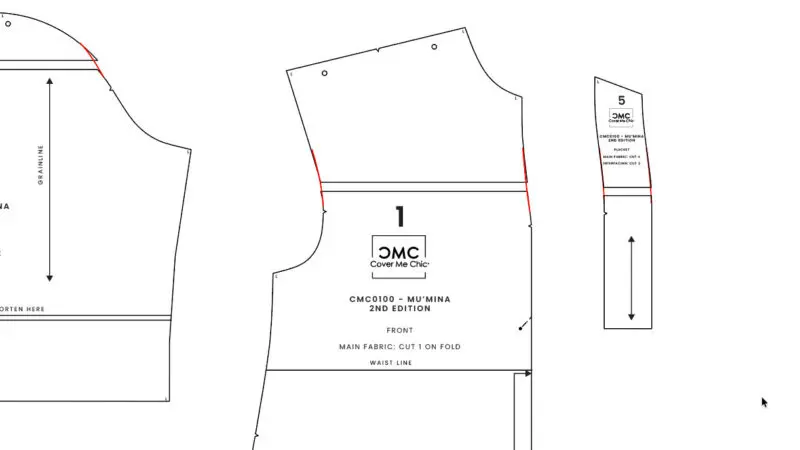
The trick is to do all adjustments above the armhole notch and preserve the grainline. By cutting perpendicular lines about an inch above the notch and shifting the pattern piece up or down, you change the armhole depth without skewing the lower armhole curve. Then you true the curve so the sleeve and armscye match. This keeps the fit balanced across the front and back pieces.
Find the notch where the sleeve meets the armhole curve. Draw a line at roughly one inch above that notch, perpendicular to the grainline. This is your cut point.
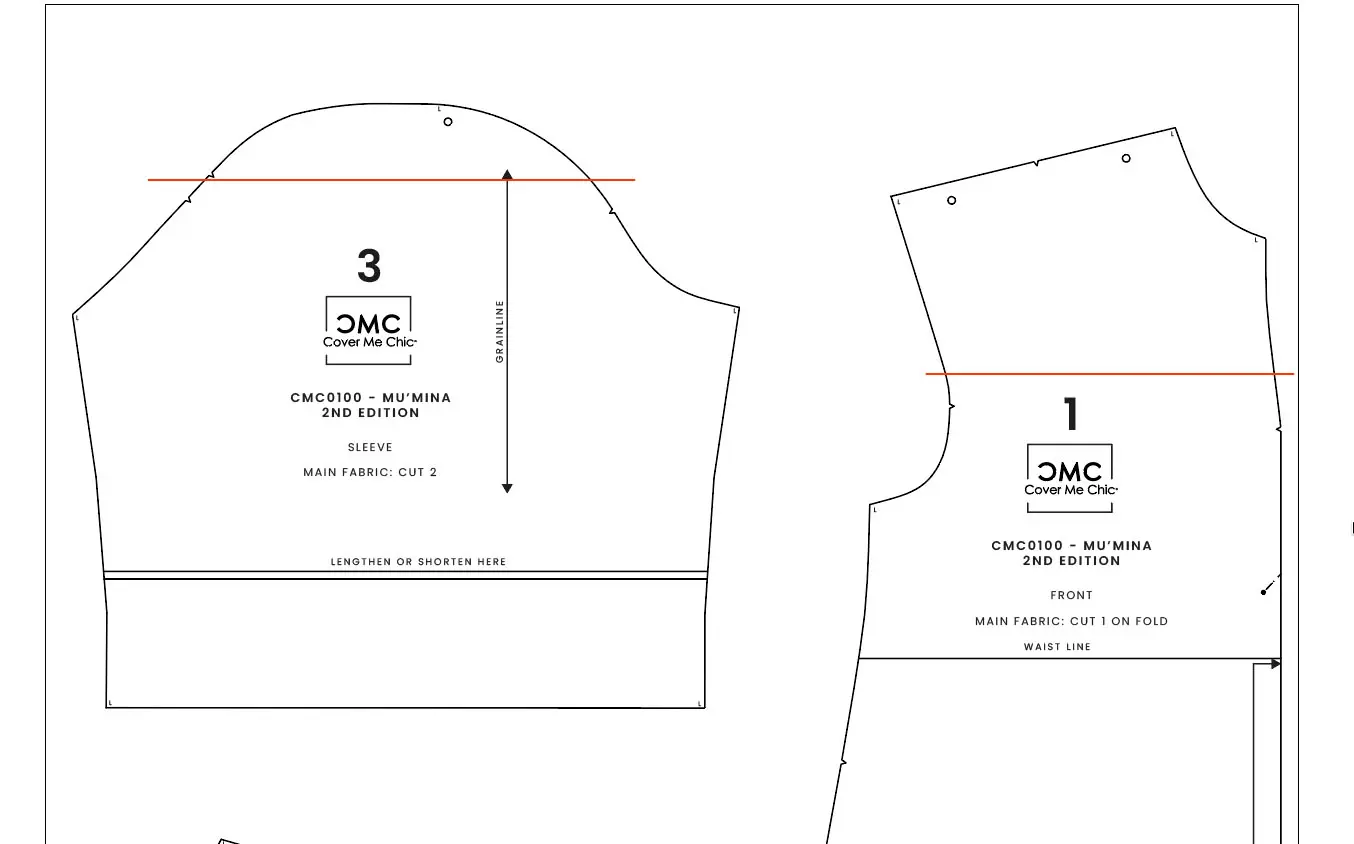
2. Cut and shift.
Cut along the line on both front and back pieces. Move the top section up to make the armhole larger, or down to make it smaller. A good rule of thumb: shift by about 1/2″ for a notable change; do not exceed 1″ total, or the pattern will skew and look “wonky.”
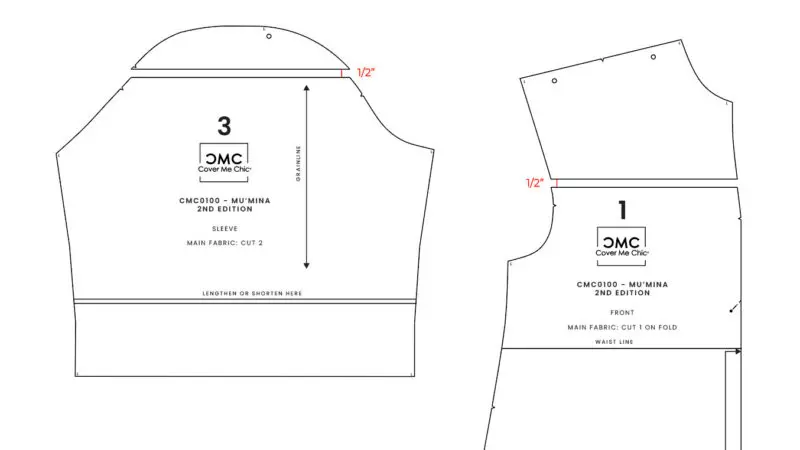
3. Keep the grainline aligned.
Make sure the grainline (usually a straight green or drawn line) remains perpendicular to your cut and consistent across the moved piece. This preserves fabric alignment and hang.
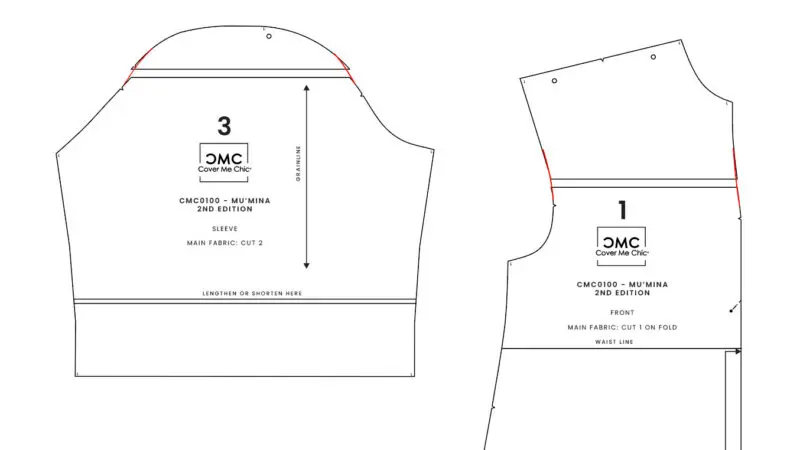
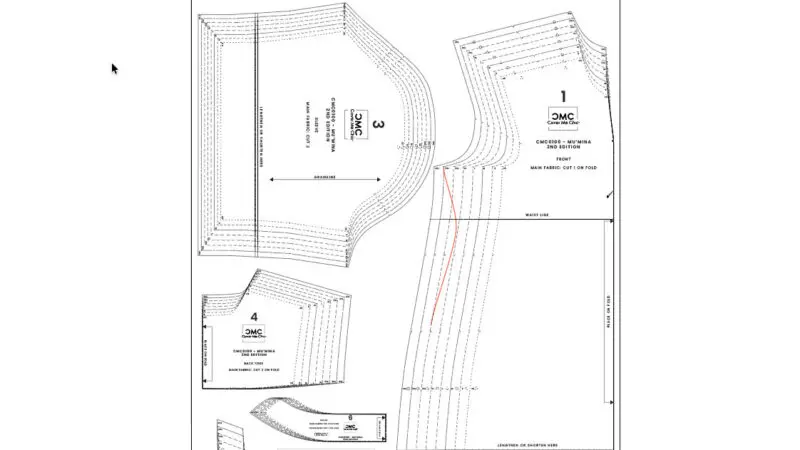
On the sleeve, cut at the corresponding point and move the sleeve cap up or down by the same amount you adjusted the bodice. This keeps sleeve ease proportional to the new armhole depth.
With the pieces shifted, the curve often needs smoothing. Use an armscye or small curve tool to “chew in” and redraw the armhole so it matches the sleeve cap. Mark the altered seam lines in a new color to avoid confusion.
6. Adjust facings if present.
If your pattern has a front placket or placard, move its top point up or down with the bodice so it aligns. If you want a shorter placard, trim it at its lower point and redraw the edge.
7. Make a muslin and refine.
Sew a test version in a similar-weight knit or muslin fabric to evaluate fit. It’s much easier to make minor tweaks after you’ve seen the garment on a body.
When you need to blend sizes, focus on the bust and shoulders first — they’re the hardest areas to fit, especially on fitted tops with set-in sleeves. Don’t make dramatic size jumps; instead, add moderate extra and sew a muslin to decide if further easing or taking in is required.
Sleeve and armhole adjustment doesn’t have to be intimidating. With a measured cut above the notch, matching movement on the sleeve, and careful truing of the curve, you can tame a troublesome armhole and get a clean, comfortable fit. Try the method on a test piece, and you’ll gain confidence for your next fitted top.
Have questions or a fitting horror story? Share it — I’d love to hear what you adjusted and how it turned out.
Download your free how to Measure your body Tool Kit.
There was a problem reporting this post.
Please confirm you want to block this member.
You will no longer be able to:
Please note: This action will also remove this member from your connections and send a report to the site admin. Please allow a few minutes for this process to complete.