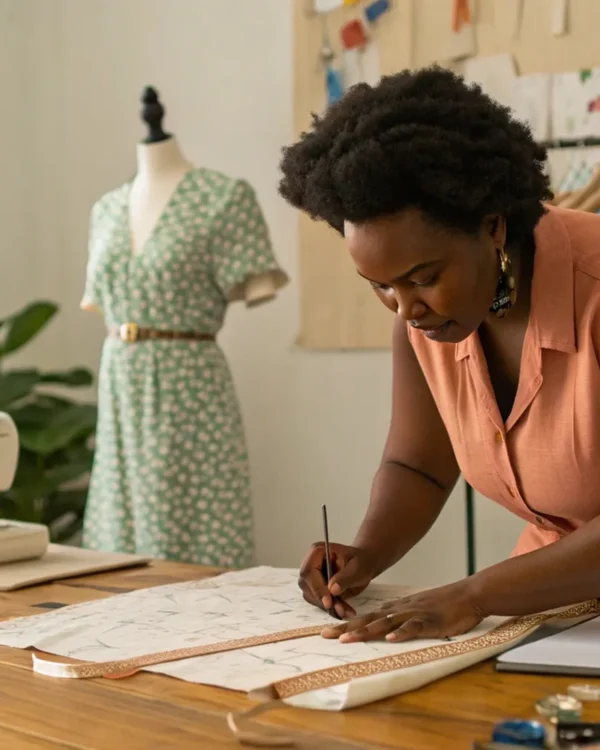
Sewing is a wonderful craft that combines creativity, patience, and skill. But if you’re new to sewing, you’re bound to encounter some sewing fails that can be both frustrating and hilarious. As educators and experienced sewers, we’ve seen it all—from beginner mistakes to unexpected challenges that even seasoned makers face. Whether you’re just starting to sew or teaching others, these stories and tips will help you embrace the learning curve, avoid common pitfalls, and keep your passion alive.
Teaching sewing to beginners, whether kids or adults, is always an adventure. One of the funniest moments happened during a summer camp when a co-teacher accidentally sewed a student’s pants the wrong way. We thought the student wouldn’t notice, but the next day she walked into class and immediately asked, “What happened to my pants?” It’s a great reminder that everyone makes mistakes, not just beginners.
Another memorable moment was introducing ironing to college students who had never ironed before. Yes, you read that right—many adults have never used an iron! Watching their surprise when steam started coming out of the iron was priceless. This experience taught us how crucial an iron is to sewing success. In fact, our class motto is: “The difference between crafted and homemade is your iron.”

One essential lesson for beginners is understanding the difference between ironing and pressing. Ironing removes wrinkles, while pressing is about setting seams flat and making them permanent. Pressing with an iron helps seams lay flat and gives your project a polished look. We always encourage students to “press everything” because it makes a huge difference in the final garment’s fit and appearance.
We also introduce tools like the tailor’s ham, which helps press curved seams such as princess seams. Many beginners are blown away by this tool because it’s not something you naturally know about—it comes from experience and learning the nuances of sewing.
One of the biggest challenges for beginner sewers is learning how to read and use sewing patterns correctly. Simple concepts like what “cut on the fold” means or identifying the selvage edge of the fabric can be confusing at first.
We often see beginners cutting pieces incorrectly or sewing front and back pieces together without matching notches, which results in garments that don’t fit. Notches, circles, and other pattern markings are like puzzle pieces—they guide you to assemble your garment properly. Ignoring them leads to wasted fabric and frustration.
Marking your fabric with notches and circles is critical. They tell you where pieces align and how much seam allowance to use. For example, if a pattern calls for a 5/8 inch seam allowance but you sew with only a 1/4 inch, the garment won’t fit as intended. This is where sewing meets geometry and math—precision counts!
We’ve even had students confused about fractions and decimals when measuring fabric or seam allowances. To help with this, we offer a fraction-to-decimal chart download that’s a handy reference for beginners.
Using the right tools is crucial for sewing success. For example, we always recommend using a mechanical pencil for pattern making instead of a regular pencil. A mechanical pencil produces a fine, consistent line, while a regular pencil can have thick lines that add unwanted width to your pattern pieces, resulting in garments that are too big.
And of course, never underestimate the power of a good seam ripper. Even experienced sewers carry one everywhere because mistakes happen—sometimes even multiple times in a row! Sewing when tired is a recipe for errors, so take your time and be patient with yourself.
It’s easy to feel discouraged when things don’t go as planned. We’ve had beginners who made mistakes like cutting pattern pieces wrong or sewing seams inside out. One student even quit after a frustrating experience. Our advice? Don’t quit! Every mistake is a step toward mastery. Keep trying, learn from your errors, and embrace the journey.
If you want to deepen your sewing knowledge and improve your skills, check out our blog post on Top 5 Sewing Mistakes and How to Avoid Them and learn how to sew like a pro in Sew Like a Pro: 8 Ways to Make Your Sewing Look Professional.
Sewing is a craft that requires patience, practice, and a willingness to learn from mistakes. Whether you’re a beginner or an educator, remember that every sewing fail is a valuable lesson. Use the right tools, understand your patterns, press your seams carefully, and most importantly, keep going.
For those just starting out, explore our beginner-friendly resources like Essential Sewing Tools for Every Sewer and discover how to Sew Your Own Clothes with confidence.
Happy sewing, and remember: the journey is just as important as the finished project!
00:00 – 00:04
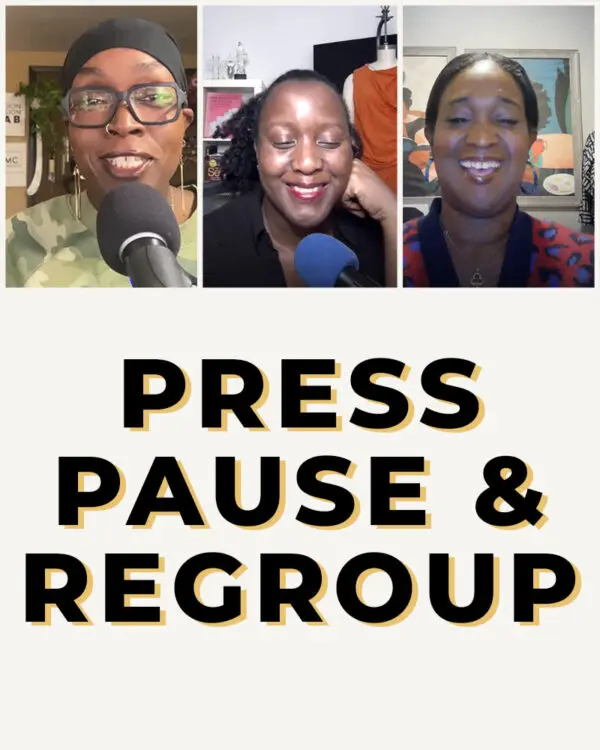
Welcome to the Designers Plants and Coffee podcast, where we’re sewing, sipping, and staying rooted.
00:04 – 00:10
We’re three creative women building handmade businesses and sharing real conversations about
00:10 – 00:14
design, growth, and what it really takes to make things that matter.
00:14 – 00:18
So grab your coffee, pull up a project, and let’s grow together.
00:18 – 00:25
We’re going to talk about the most interesting and funniest things we’ve heard or seen as educators
00:25 – 00:28
or, you know, teaching beginner sewers how to sew.
00:28 – 00:32
And, you know, just the nuances of learning a new craft.
00:32 – 00:34
You can take it away. Naima, you first.
00:34 – 00:41
I think the funniest for me is comparing, like, my kids to adult and seeing some of the same things that we. That they do.
00:41 – 00:46
One of the funniest stories I have actually is not even from a kid, and I’m not gonna say any
00:46 – 00:51
name because I know she watches the podcast, but we were teaching at summer camp, and we had
00:51 – 00:56
this thing on Thursdays where if the kids weren’t finished their projects, we would be sewing
00:56 – 00:58
fairies and kind of help their projects along.
00:58 – 01:03
And my co teacher sewed the pants for this student, but she sewed it wrong.
01:03 – 01:06
So we were like, we’re all tired. We’re gonna go home. She won’t notice, right?
01:06 – 01:11
That baby came in that classroom the next day and said, what happened to my pants?
01:12 – 01:17
And so to this day, every time we see each other, we joke about that story about what happened to the pants.
01:17 – 01:22
So that’s my starter story to say that it’s not just students that it happens to.
01:22 – 01:25
Sometimes educators have that problem too.
01:25 – 01:30
That’s one really good one that shows that it’s not just the. That makes mistakes.
01:30 – 01:31
Tish.
01:31 – 01:38
So when I’m teaching sewing, I introduce the iron and giving someone who has never ironed before.
01:38 – 01:46
In a couple of the classes, there was one of the early factory irons with the steam, and it
01:46 – 01:47
has the stuff at the bottom.
01:47 – 01:54
So telling them this is how this iron works, and they’re looking at you like, well, why is the steam coming up?
01:54 – 01:58
Because it’s the water coming down into the iron.
01:58 – 02:02
Wait, okay, these are college students or these are adults?
02:02 – 02:03
These were college students, and they have.
02:03 – 02:05
Never ironed anything before.
02:05 – 02:10
Never ironed anything. So I’m introducing them into ironing.
02:10 – 02:14
And might I say, it’s not just college students.
02:14 – 02:16
I teach adults who do not iron.
02:16 – 02:21
I’ve had several of my adult students say, oh, my God, because of this class, I went and bought an iron.
02:21 – 02:23
Wait, they didn’t even own an iron.
02:24 – 02:25
A lot of them do steam, though.
02:25 – 02:26
A lot of them Steam.
02:26 – 02:29
But I tell them you can’t sew without an iron.
02:30 – 02:34
You might as well just be sewing Barbie clothes by hand if you don’t use an iron.
02:34 – 02:40
And I tell them all the time, if you have to ask, the answer is yes, iron it. Iron everything.
02:41 – 02:46
Our class slogan is the difference between handcrafted and homemade Is your iron.
02:47 – 02:49
Yes. I mean, that is half. It’s half the battle.
02:49 – 02:53
Because you can fix a lot of stakes with a good iron, a good press.
02:54 – 02:55
I don’t even like to say iron.
02:55 – 02:57
I like to say pressing.
02:57 – 02:59
Because ironing and pressing are two different things.
02:59 – 03:02
See, ironing, you’re trying to get the wrinkles out.
03:02 – 03:05
Pressing is you pressing seams.
03:05 – 03:07
You’re putting pressure on the seam to.
03:07 – 03:09
Make it flat and making it permanent.
03:09 – 03:13
You know, once you, once you press it, you’re making that seem permanent.
03:13 – 03:15
Yes, yes. And you want it to lay flat.
03:15 – 03:17
So ironing is just getting the wrinkles out.
03:17 – 03:19
And you can do the same thing with steam.
03:19 – 03:24
It was really mind boggling to hear this student say, well, well, my parents or someone else
03:24 – 03:26
were ironed for them or they just would not.
03:27 – 03:31
I don’t know if it’s a generation thing, honestly, because my daughters, they don’t like to
03:31 – 03:34
iron either, but they know how to.
03:34 – 03:37
I mean, who am I to let them walk out with wrinkled stuff and.
03:37 – 03:39
Then even introducing them to.
03:39 – 03:41
Okay, so this is the tailor’s ham.
03:41 – 03:43
This is two sides of it.
03:43 – 03:50
Okay, For Letitia, for the people in the audience that don’t know what a tailor’s hammer is, please explain.
03:51 – 03:57
You need a tailor’s ham because it’s just stuffed and one side is with cotton and the other side is wool.
03:57 – 04:00
You use it to flatten out seams.
04:00 – 04:02
Let’s say a curved seam, a princess seam.
04:02 – 04:05
You can use your tailorless ham to help you iron it.
04:05 – 04:14
But introducing that, their students were just completely mind blown between that and also having to explain.
04:15 – 04:21
So this is a tape measure and a, a quarter an inch of what that looks like, and breaking it
04:21 – 04:27
down to decimals and breaking it down to think of it as a dollar, one inch is a dollar.
04:27 – 04:32
But really having to tell them, yeah, remember all of that math that you didn’t think you need, you need.
04:32 – 04:34
I tell them sewing is geometry.
04:34 – 04:40
I’ve seen people sew one side on a quarter inch and one side on a half inch, and one side at
04:40 – 04:42
the top is a quarter and the bottom is a half.
04:42 – 04:44
And it’s like, how are you going to wear that?
04:46 – 04:50
Somebody said to me today something about Gordon Gartrell if you know, you know, it’s funny
04:50 – 04:55
when you see it in that sitcom, but it really happens, like, every day.
04:55 – 04:59
This whole discussion came about because I was telling you guys about one of my students.
05:00 – 05:02
You know, I teach that. I teach beginner. Beginner.
05:02 – 05:09
So I’m teaching them how to read a pattern and what’s on each piece. And she was. She did it right.
05:09 – 05:16
She was looking at the layout and looking at her piece, but she decided that a piece of her
05:16 – 05:20
short should be cut on the fold. And that’s it.
05:20 – 05:21
How are you gonna say this?
05:21 – 05:27
She was so frustrated, and she couldn’t figure it out, you know, And I only get them once a week.
05:27 – 05:29
So she was like, I’m just not gonna touch it until Tuesday.
05:29 – 05:31
So once I explained it, it was better.
05:31 – 05:35
But it’s something as simple explaining what the selvage and what the fold is.
05:35 – 05:37
It’s just because it comes so naturally.
05:37 – 05:40
Well, not naturally, but it comes from years of doing it for us.
05:40 – 05:45
It’s so interesting to see when the light bulb comes on when you’re teaching.
05:45 – 05:52
The fold is where you fold the fabric in half, either on a long side or the short side. And the selvage.
05:52 – 05:55
And the selvage is the edge of the fabric.
05:55 – 05:56
The end of the fabric.
05:56 – 05:57
And can you explain that?
05:57 – 05:59
There are three selvedge edges.
05:59 – 06:01
There’s a top, bottom, and side.
06:01 – 06:06
If you want to sew your pant on the fold, that means that you have no hips.
06:06 – 06:07
It’s just going to go straight down.
06:07 – 06:09
And you want to sew the front and the back.
06:09 – 06:14
You can’t really do that because the crotch in the back and the crotch in the front is different.
06:14 – 06:22
I also had somebody sew front crotch to the back crotch, which was kind of hilarious because
06:22 – 06:23
they were like, well, why is it so big?
06:24 – 06:29
And I tell them all the time, you have to mark your pieces, you have to mark your notches, you
06:29 – 06:30
have to mark your circles.
06:30 – 06:34
All of those things make sense when you are putting something together.
06:34 – 06:36
But do they listen to me? No.
06:36 – 06:38
And then they sew their back to their front.
06:38 – 06:44
I remember since you told a story about students not doing notches, you care to share that one?
06:45 – 06:52
In a class, I. We had someone come in to be the factory, and I told her, look at the tech packs. Here are the patterns.
06:52 – 06:54
I want you to sew it. Here’s the fabric.
06:54 – 06:56
She met with them, discussed everything.
06:56 – 07:00
I said, I want you to make the garment following their pattern.
07:00 – 07:02
If there’s no notch, then there’s no knot.
07:02 – 07:06
They’re going to learn their Lesson stuff will come back in pieces. Literally.
07:07 – 07:15
Like, well, why didn’t she put the waistband or puts the pant leg to the pocket or to the other pant leg?
07:16 – 07:17
Do you have a notch?
07:17 – 07:18
Is there a notch there?
07:18 – 07:20
And I go over and I look and they’re looking. They’re like, no.
07:20 – 07:22
And I’m like, well, how she supposed to know that?
07:23 – 07:26
You sent her your tech pack and you sent her your pattern and you gave her fabric.
07:26 – 07:29
You literally wasted a whole day and you paid.
07:29 – 07:35
Yeah, you wasting time and money without having the proper indicators on your pattern.
07:36 – 07:38
They come to me all the time and wonder why it’s not working.
07:38 – 07:42
I’m like, where are your notches? I don’t know. What’s the front? I don’t know. What’s the back?
07:42 – 07:44
I don’t know which piece goes where.
07:44 – 07:47
If you don’t even put your circles.
07:47 – 07:49
Put your notches, we need.
07:49 – 07:50
They are your puzzle piece.
07:50 – 07:53
You cannot put your pattern together without it.
07:53 – 07:55
But they learn the hard way.
07:55 – 07:57
Then they come and everything is big.
07:57 – 08:02
And then even with teaching someone pattern making, I tell them I want a mechanical pencil.
08:02 – 08:04
Do not use a regular number two pencil.
08:04 – 08:06
So this is mechanical pencil.
08:06 – 08:07
See how lovely this is?
08:08 – 08:09
Here’s your number two pencil.
08:09 – 08:10
And this is the point.
08:10 – 08:14
See the difference, the width of it? This is 13.
08:15 – 08:16
This a quarter of an inch.
08:16 – 08:18
You can have 16 lines in it.
08:18 – 08:21
And now you’ve added over two inches on something.
08:21 – 08:24
They’re like, why is it big? Well, let’s see.
08:24 – 08:27
You use the mechanical pencil and you should have used.
08:28 – 08:30
Well, you use a regular pencil.
08:30 – 08:31
You should have used the mechanical one.
08:31 – 08:39
You made sure you made your pattern wider because your lines are so thick, you went to the outer edge that’s adding measurements.
08:39 – 08:44
So think of it as a quarter plus a quarter plus a quarter plus a Quarter plus times 16.
08:44 – 08:48
When you have to stop and sharpen that pencil, it.
08:48 – 08:52
It changes the width of the pencil every time you have to sharpen it.
08:52 – 08:55
But, you know, they, they waste a lot of time and energy.
08:56 – 08:58
That’s exactly why math matters.
08:58 – 09:06
I just had somebody ask me, what does 3/4 to 5,8 of an inch of a yard mean?
09:06 – 09:07
What does it mean?
09:07 – 09:14
Yeah, because their fabric, their fabric measurements was bring 3/4 to 58 of a yard of fabric
09:14 – 09:15
to class on the first day.
09:15 – 09:18
Now this is, this is not beginner. Beginner. So.
09:18 – 09:19
Well, I don’t know what that means.
09:19 – 09:27
You know, I have a fraction to decimal chart that I think I’m going to include in the, in a download.
09:27 – 09:30
So, you know, look in the Description just so that you have it.
09:31 – 09:36
It’s interesting having to explain and explain and then kind of break it down to.
09:36 – 09:42
This is why I’m telling you this, because later on it’s going to come up, hey, you know you
09:42 – 09:45
wanted to do that princess seam dress.
09:45 – 09:48
Well, it said 58 of an inch for the seam allowance.
09:48 – 09:49
You did a quarter.
09:50 – 09:56
And I mean, it’s not only bigger, it doesn’t fit correctly because you did not sew all of the seam allowance.
09:56 – 09:59
So the seams won’t match up properly.
09:59 – 10:00
That’s where the notches come in.
10:00 – 10:06
So you have to line up the notches and the seam allowance doesn’t add up.
10:06 – 10:07
So you really have to.
10:07 – 10:12
I mean, I know, Naomi, you said that in the beginning, teaching people how to read patterns.
10:12 – 10:16
I mean, on the pattern, it says what the seam allowance is.
10:16 – 10:20
The funniest was in teaching somebody how to read a pattern.
10:20 – 10:25
Now she was cutting out some piece that needed to be cut on the fold.
10:25 – 10:30
And she said, well, why can’t I just cut it into two and sew it together?
10:30 – 10:32
And I said, because it’s going to change the shape.
10:32 – 10:37
But I mean, even if I add an inch, I said, how do you know it’s an inch?
10:37 – 10:39
And she said, well, I just.
10:39 – 10:41
I just think I can do it that way.
10:41 – 10:46
And I said, godspeed, you do it however you see fit.
10:46 – 10:52
And she came back the next week and she asked me again, I just don’t understand why I can’t cut two of them.
10:52 – 10:59
I said, my answer is not going to change because you want to save a scrap of fabric. She cut it.
10:59 – 11:02
She did not cut it on the fold, and it didn’t fit.
11:02 – 11:07
And she didn’t come back to class after that. Really. She quit.
11:08 – 11:12
You know, I just want to say something just because, I mean, we’re going over this.
11:12 – 11:14
This is all in fun, right? Don’t quit. Keep trying.
11:14 – 11:17
I mean, listen, all of us make mistakes.
11:17 – 11:20
You know, sometimes you sold the wrong piece of the wrong. It’s.
11:20 – 11:21
All of us have done it.
11:21 – 11:24
You know, we like to be transparent on this show.
11:24 – 11:27
I was making something the other day. It was late. I was tired.
11:27 – 11:33
When I looked at what I did the next, I had sewn on, it was three different things.
11:33 – 11:39
I had sewn every single one of them wrong side to right side three times in a row.
11:39 – 11:42
And I was like, this is why you don’t sew when you’re tired.
11:42 – 11:47
All the years of experience we have, we still make these silly little mistakes.
11:47 – 11:50
We still all carry a seam ripper everywhere we go.
11:51 – 11:54
You know, this is the first thing that I tell the students.
11:54 – 11:58
Open your your your your supplies.
11:58 – 12:00
Your seam ripper is your best friend.
12:00 – 12:01
So that’s it for us.
12:01 – 12:07
I’m going to have the fraction of the decimal download underneath this video and in the show notes.
12:07 – 12:13
If you want to download that, I am Zahia from Coverme Chic along with.
12:13 – 12:15
Leticia of keeping you in stitches.
12:16 – 12:17
Fearless threads.
12:17 – 12:18
We’ll see you next time.
12:19 – 12:22
Thanks for hanging out with us on the Desiders Plants and Coffee podcast.
12:22 – 12:28
If you love this episode, please leave a review, share it with your creative friend, or tag us on Instagram.
12:28 – 12:32
Until next time, keep dreaming big and growing slow.
Download your free how to Measure your body Tool Kit.
There was a problem reporting this post.
Please confirm you want to block this member.
You will no longer be able to:
Please note: This action will also remove this member from your connections and send a report to the site admin. Please allow a few minutes for this process to complete.